Как делаются часы - Часовой форум Watch.ru
 
Вернуться назад   Часовой форум Watch.ru > Информация, аналитика о часах > Обзоры и информация
Регистрация | Забыли пароль?

Обзоры и информация

Ответ
 
Опции темы
  #1  
Старый 20.03.2009, 14:44
Аватар для Ego
Ego Ego вне форума  
Moderator
 
Регистрация: 03.11.2005
Адрес: Киев
Сообщений: 32,155
Сказал(а) спасибо: 2,127
Поблагодарили 52,540 раз(а) в 10,190 сообщениях
Как делаются часы

Starting with pencil and paper, Don will sketch out various designs with proper proportion. After which he transfered the sketches to the CAD (Computer Aided Drawing). From the CAD, visualization is easier and more accurate.
After that he proceeded to workout the movement.


A few of Don's computer renderings of his new creation ...


After completing the design and compiled the Bill of Materials (BOM), he proceeded to purchase materials.

Once the materials were in his atelier, fabrication began....


Fabrication

It starts with just two stress released brass blanks for the plate and bridges.


Those blanks get riddled with holes, a total of 101 holes in 19 different diameters.


Some of those holes are then threaded...


Then a little lathe work to remove the excess metal...


It is like making a sculpture, hammer and chisel, just remove the material that doesn’t belong to
David and leave the wanted.


Preparation of the steady pins ....


To keep everything in its proper place, steady pins are pressed fitted into the designated holes...


The bridges (up till now were in a single piece of material) were cut into individual pieces.


After fitting the jewels, the train wheels were first mounted.


Next is to fabricate the anchor bridge, drilled all the holes and milled the top side.


After milling the bottom side, turning out the part.


The anchor bridge.


Here you can just see the anchor bridge jeweled and mounted under the balance wheel.


Drilling the stem hole...


Before we can mount the winding train we need to make the wheel studs. Above is turning the stud
from a brass rod…


drilling the screw holes…


and making the countersinks to finish the stud.


Now the studs are mounted. Only the ratchet wheel is to be added.


On the dial side the keyless works has been made and assembled ...


the motion works held in place with the cover.


Now that the movement is fully assembled and works, the next step is decoration.


Before the decoration process, the components were disassembled....


All the steel parts that have been pressed into the plate, such as the axles were removed
otherwise they will be destroyed during the process of plating...


The bare plate and bridges.


Источник: http://home.watchprosite.com/show-fo...ti-499886/s-0/
__________________
Правила форума
Ответить с цитированием
Эти 2 пользователей сказали Спасибо! Ego за это сообщение:
Gek (16.12.2009), Rump (08.03.2015)
  #2  
Старый 20.03.2009, 14:45
Аватар для Ego
Ego Ego вне форума  
Moderator
 
Регистрация: 03.11.2005
Адрес: Киев
Сообщений: 32,155
Сказал(а) спасибо: 2,127
Поблагодарили 52,540 раз(а) в 10,190 сообщениях
Decoration

Now that the parts for the Dresdener Regulator are made the decoration of the plate and bridges will be performed.

Start by forming the final shape of the bridges.


The perlage is done at overlapping positions with a rotating tool. However, the surface needs
to be prepared so no blemishes will be seen amongst the “pearls”.


The first row of “pearls” is placed overlapping slightly less than half of their diameter.


The second row is finished and the third just begin.


The dial side perlage is finished.


Now it is time to finish the bridges.
Firstly, cleaning up the edges. The picture below showed the filing patterns left behind by a
coarser file.


Here after the second-cut filing and brushing.


For the bridge beveling, here are the tools used. Starting from the right are the very fine flat and rounded files,
followed by the super fine flat and rounded files, Degusit files (synthetic ruby) and lapping films (in various grades) to achive mirror polish.


The bridge beveling starts by forming the bevel with a very fine file and cleaning that up with a super fine file.


Then the Degussit files and lapping till mirror finish with 3 different grades of lapping film. The picture shown is after the 9 micron lapping film.


Continue till the bevel is perfectly polished. This is just missing the final high luster polish with diamantine.


Next is to cut the jewel countersinks…


followed by polishing with diamantine on a wood polishing tool.


The bridges are screwed to a fixture for the côtes de Genève process.
Note that the surfaces are almost polished so that no blemishes will be seen through the côtes.


Côtes de Genève are made using a slightly inclined tool that ensures a distinct line at one side
and then moving the workpiece in a linear pattern under the tool.
Here 3 stripes are done. You can see the distinct line at the right and the curves running out to
the left. The next stripe will cover that ragged edge to the left.


7 côtes were done ...


The finished barrel bridge.


The dial frame is treated in the same way as the bridges; polished bevels and then côtes de Genève.
The same plating will also be given to the watch, dial side and movement side to give a uniform decoration.

Here initial filing of the bevel…


followed by the same 5 intermediate steps as with the bridge beveling.
The final polishing with diamantine…


followed by the côtes de Genève.


Here are all the pieces to be plated in ruthenium-anthrazit.


Ready to ship off to the plater...


After a couple of days, the parts are back in a nice warm charcoal color.


The re-assembly will start after some more parts, like the wheels, are finished in the next installment.


Источник: http://home.watchprosite.com/show-fo...ti-501361/s-0/
__________________
Правила форума
Ответить с цитированием
Эти 2 пользователей сказали Спасибо! Ego за это сообщение:
Gek (16.12.2009), Rump (08.03.2015)
  #3  
Старый 20.03.2009, 14:47
Аватар для Ego
Ego Ego вне форума  
Moderator
 
Регистрация: 03.11.2005
Адрес: Киев
Сообщений: 32,155
Сказал(а) спасибо: 2,127
Поблагодарили 52,540 раз(а) в 10,190 сообщениях
More Parts Finishing

Parts finishing continues with the wheels.

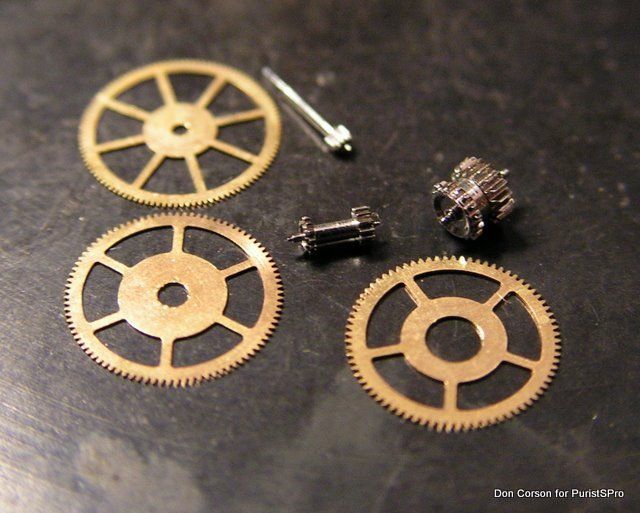
Here we see the wheels as delivered by ETA, the form stamped, the teeth cut and then flash
gold plated to prevent corrosion; quality high volume production, but not pretty.
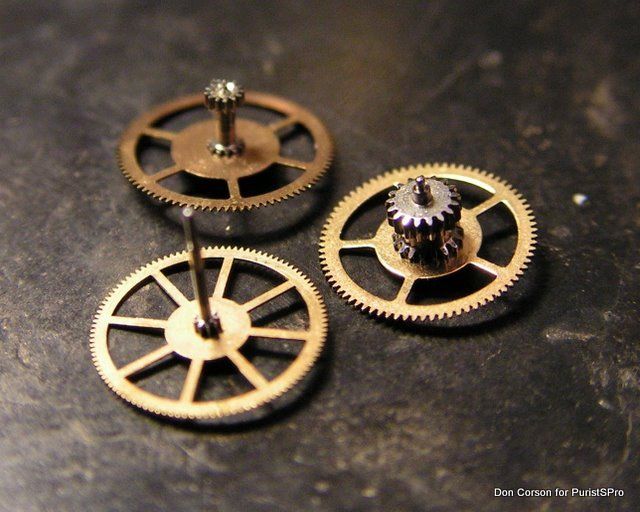


First the wheels are removed from the pinions in order to be able to work on them.


The intermediate wheel mounted on a fixture ready to start the work, note the ugly rounded corners of the spokes.
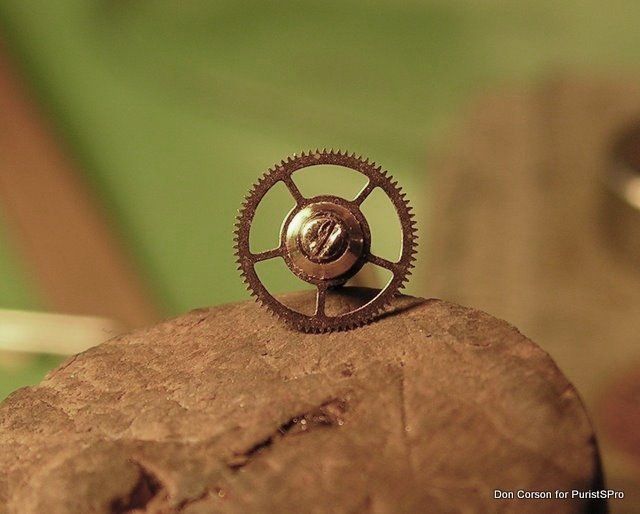


1) Square up all the corners
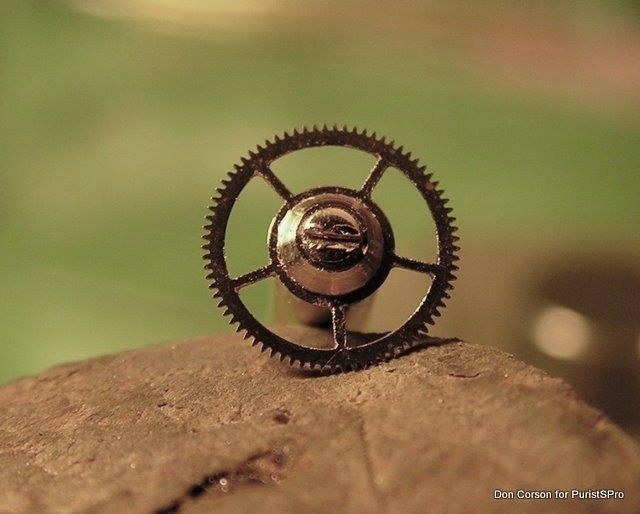


2) Bevel all the edges with a fine file.
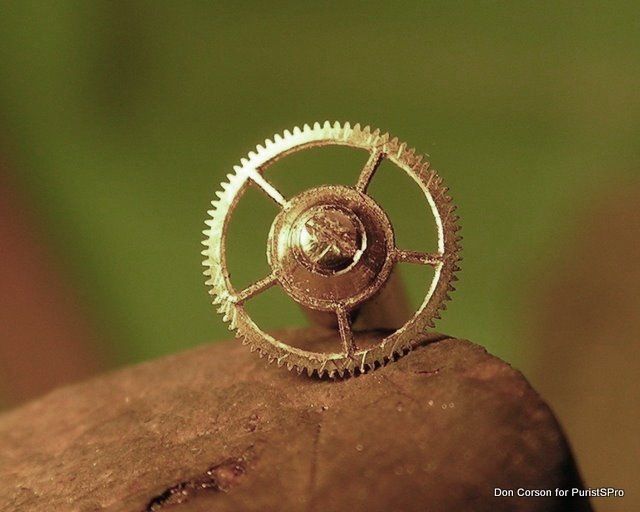


3) 4) 5) Finer finishing up to polished bevels
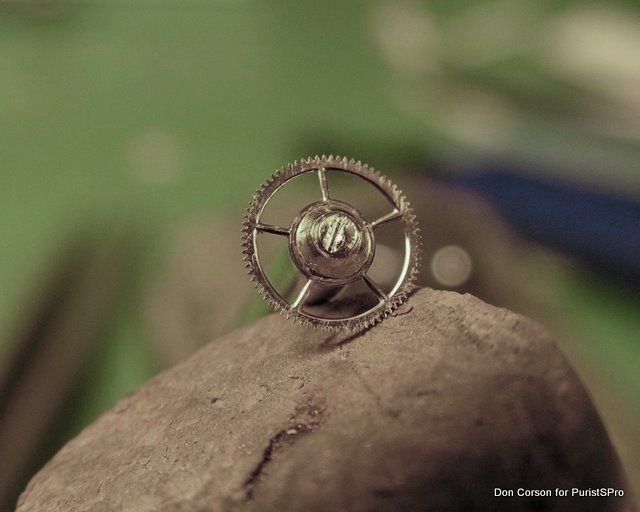


Here the seconds wheel. In the pictures these pieces all look nice and big, easy to work on, but take your watch and
take a good look at the real size of the seconds wheel, for example. Now imagine the size of the tools and the care
needed to work on that piece!
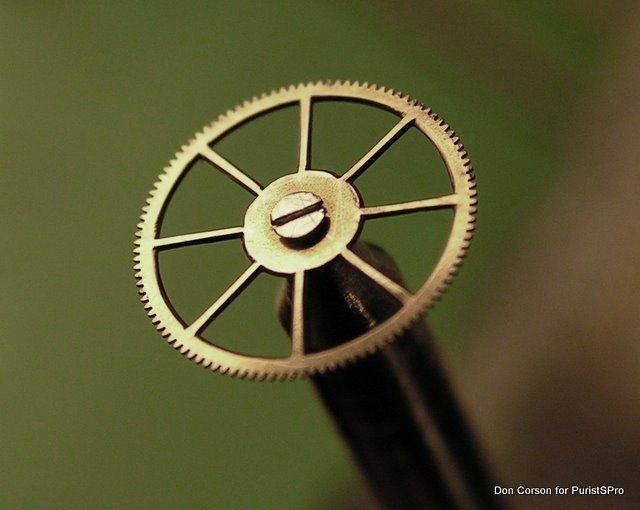


6) Cerclage (French "cerclage" meaning an encircling) with finishing film.
The wheel is held in place on the lathe with double sided tape.
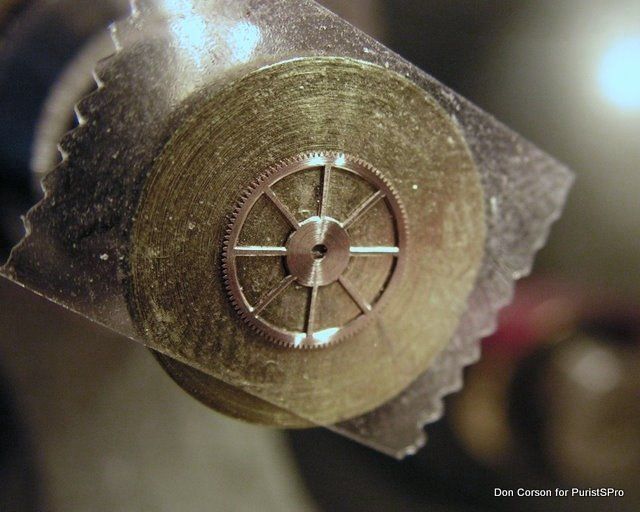


The decorated wheels (with polished bevels and cerclage) are ready for plating.
Plating is not just decorative, but prevents the brass from oxidising with time.
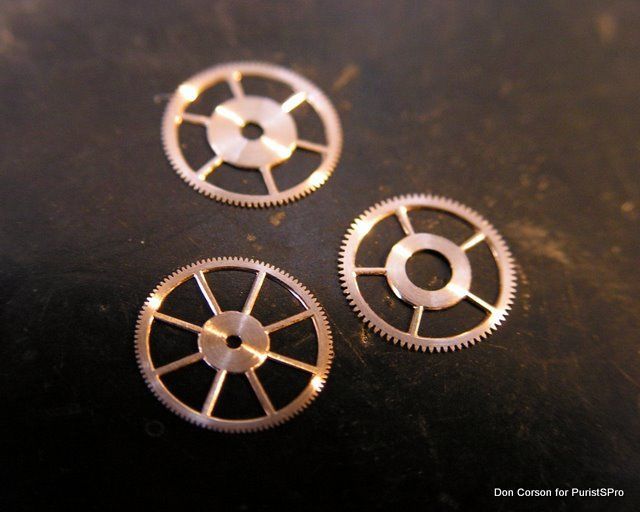


7) Back from rhodium plating.

The idea for this watch is to make the decoration the same from the dial side and the movement side.
Both the dial and the movement have ruthenium plated Côtes de Genève and there are rhodium plated hands and wheels.

Curious to see how this works when the watch is completed.
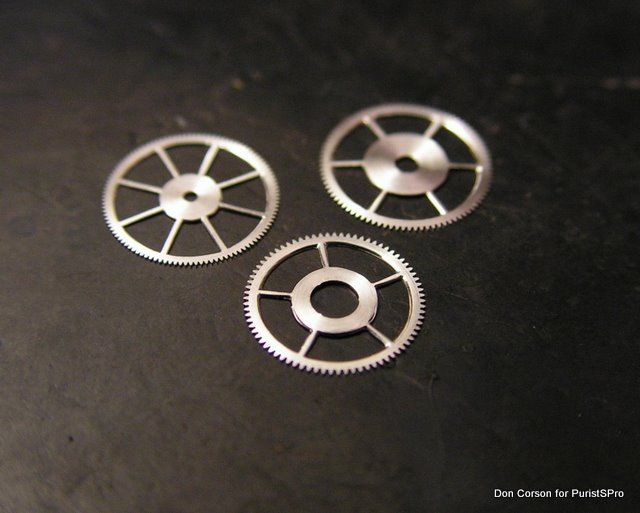


Now more work for the dial side, making the hands.
The hands are cut out roughly from a piece of hammered 18k gold sheet.
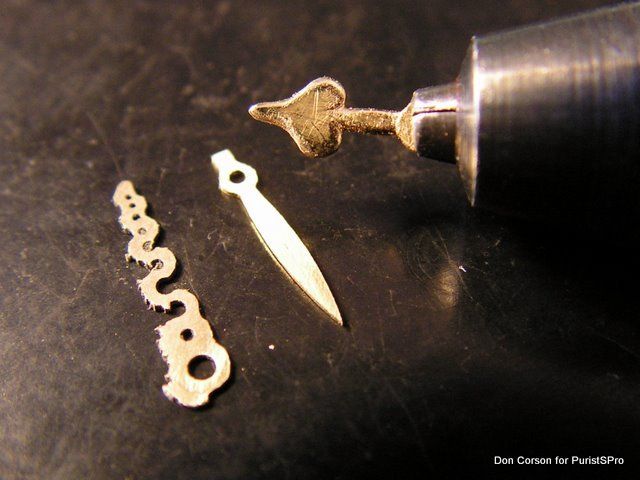


The hour-hand formed with a fine file and degussit stone.
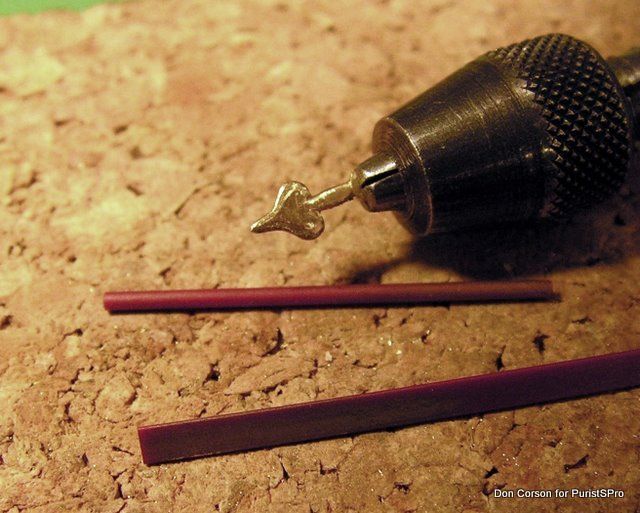


The hour and minute hands are ready for finer finishing and final polishing.
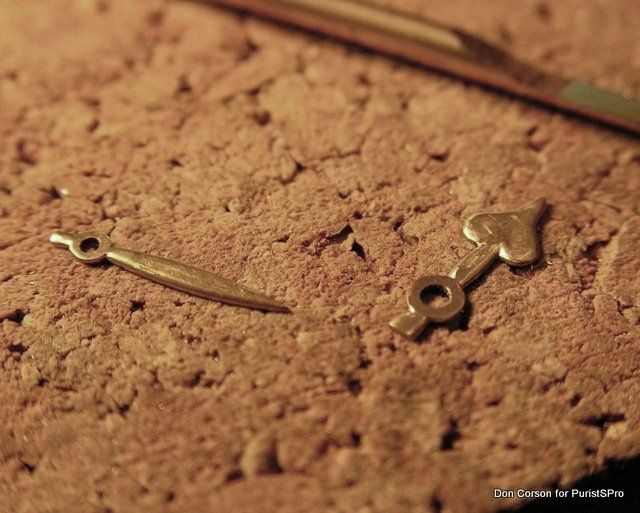


The hour hand polished, there is still some residue of the polish on certain places.
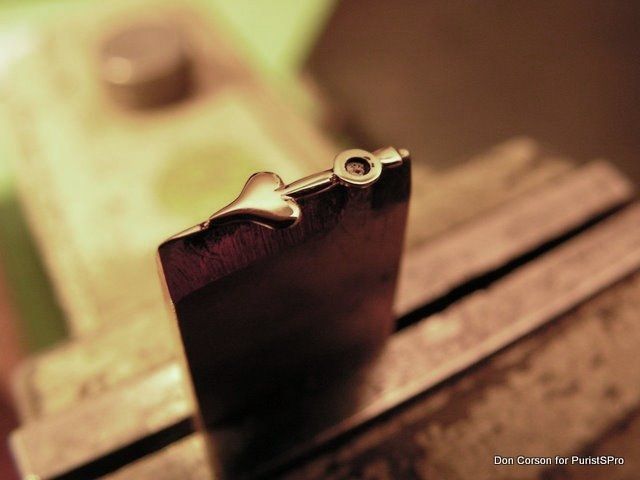


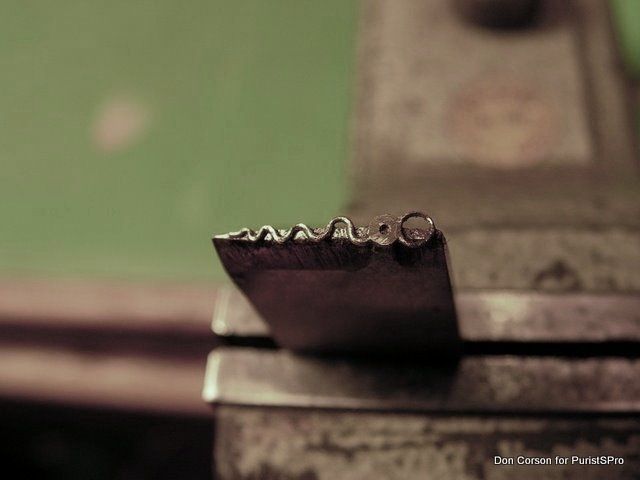
The seconds-hand is ready for polishing.


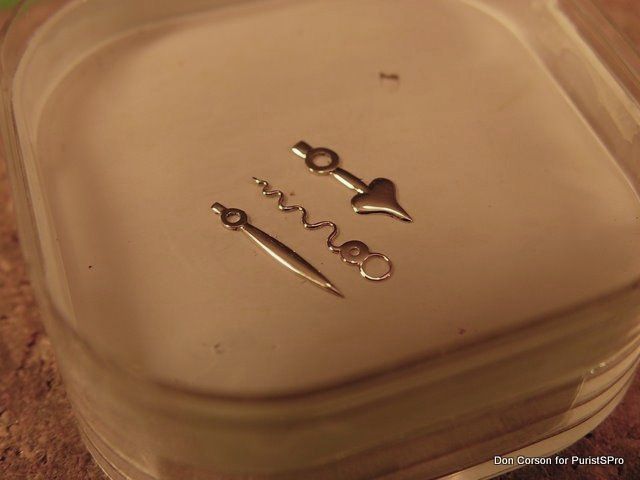
Now the three hands are ready for rhodium plating.


Of course the hands want to be presented before a nice dial.
Here the raw slate dial, slate glued to a brass support with the dial feet.
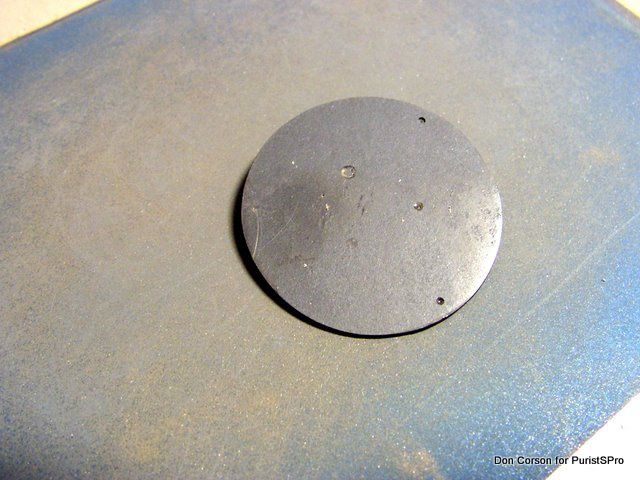


After filing to thickness and polishing the pyrite speckles and the figuration in the stone is brought to the fore.
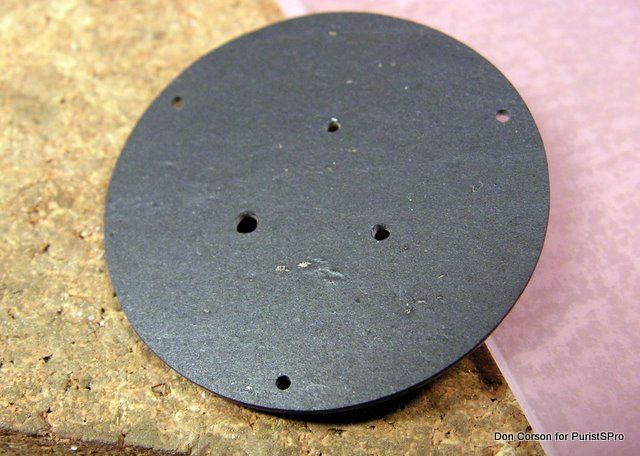


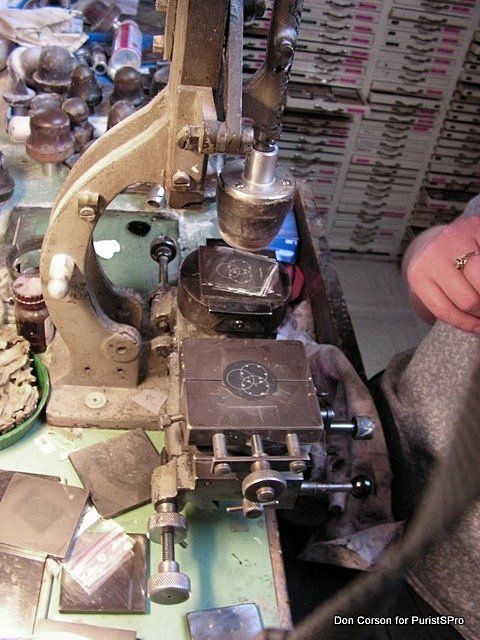
The dial is printed using transfer printing. The pattern to be printed is engraved on a steel plate. The ink is smeared on
this plate and then the surface is cleaned off using a sharp spatula which leaves ink in the engraved recesses of the
steel plate. This ink is then picked up and transferred to the dial with a gelatine tampon, thus “transfer printing”.

According to Don, he went to one of the few remaining specialists in Switzerland who still does this work by hand, one piece at a time.


The case Don is working on now is a prototype in brass.
Will present just one little part of the case making, making the crown. The rest of the case and the buckle is made
similarly. Starting from a cast blank the piece is turned and/or filed by hand to its final size and shape after which the
surface finishing, brushing or polishing is applied. This is exactly the same procedure that Don uses for the final case in gold.

Here is the crown as it has come back from casting.
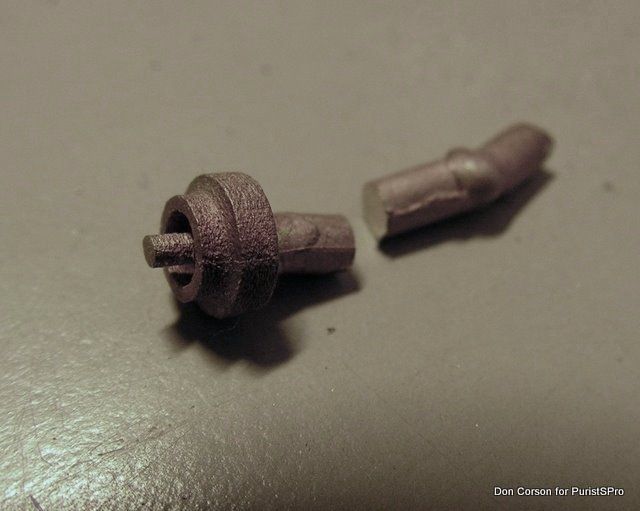


After cutting of most of the sprue (the sprue is the channel through which the molten metal is poured into the casting mold)
the rest will be turned true as a support for turning.
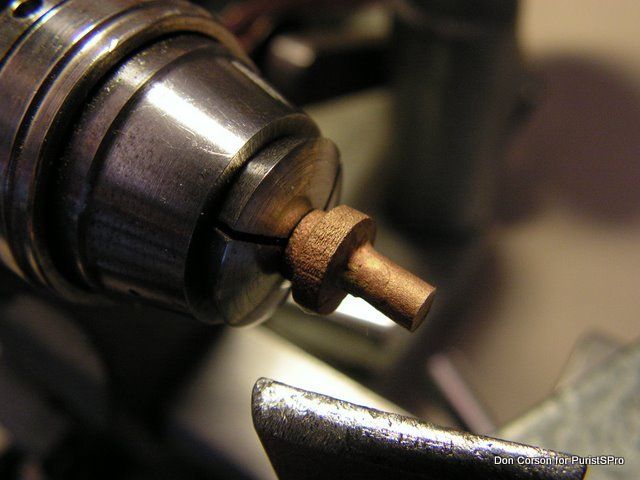
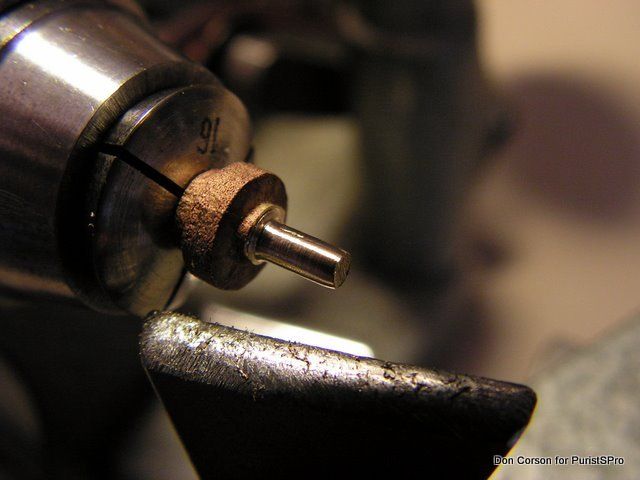


Here the body of the crown is cleaned up.
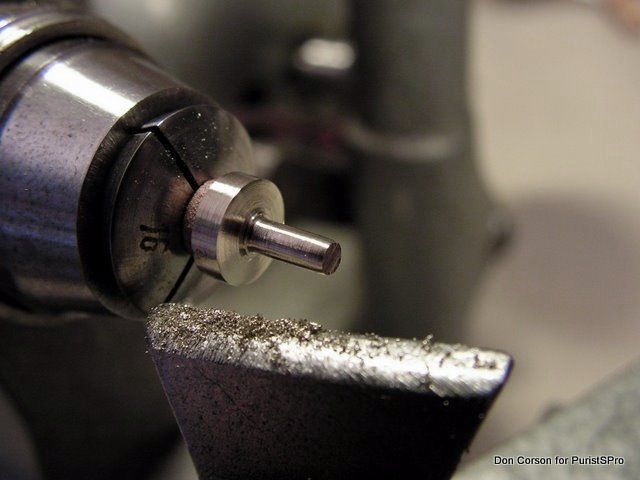


Now chucked up by the sprue the inside of the crown can be turned.
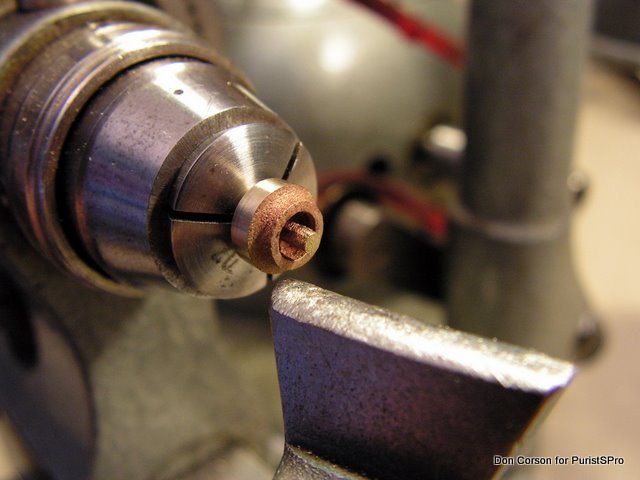


The water tightness of the crown gasket depends on the inside being turned smooth and to dimensions.
A ring will be pressed in later to hold the gasket in place.
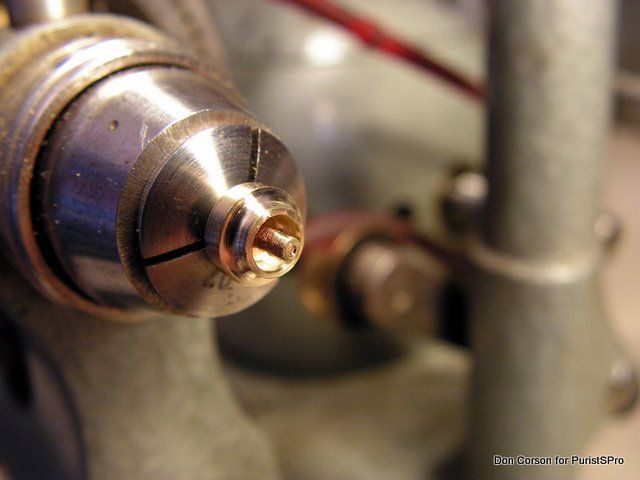


The threaded hole for the stem is drilled and tapped and the concave surface is polished.
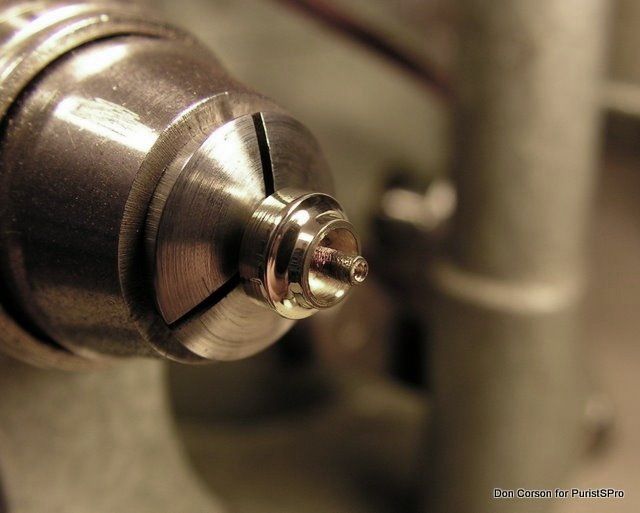


And finally the end of the body brushed concentrically…
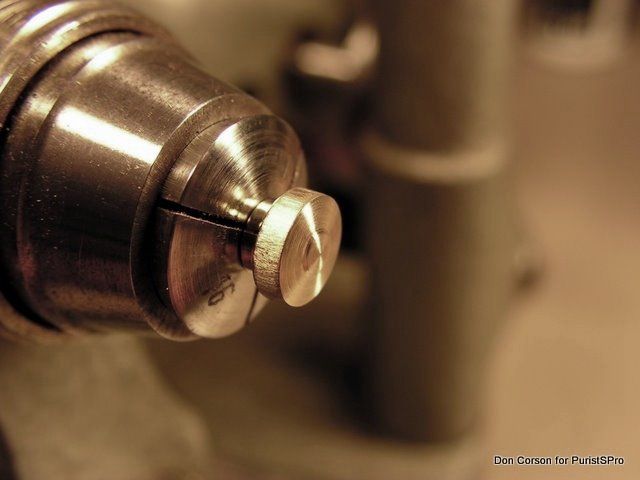


and the edge brushed straight.
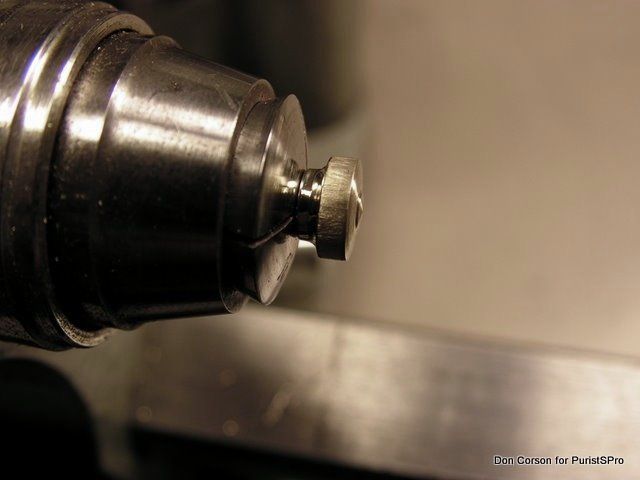


The completed prototype crown will now be gold plated, the final crown will, of course, be solid gold as will be the case.
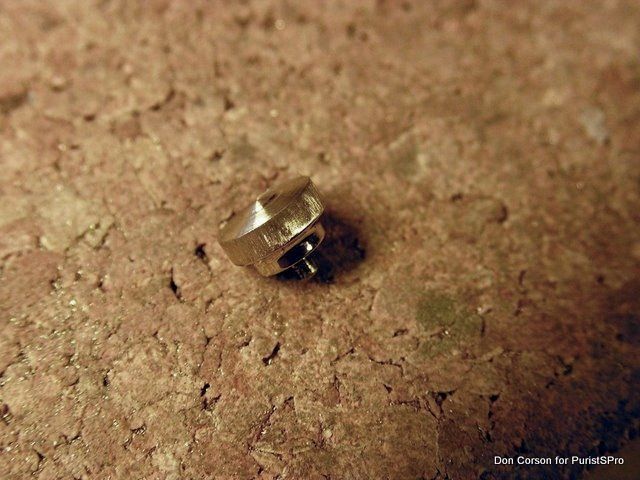


For the crown this goes relatively quickly as all can be done on the lathe, this is less than half a day’s work. The total
time for all the case work is about a week of filing and finishing by hand.

Here the results after gold plating in 5N red gold.
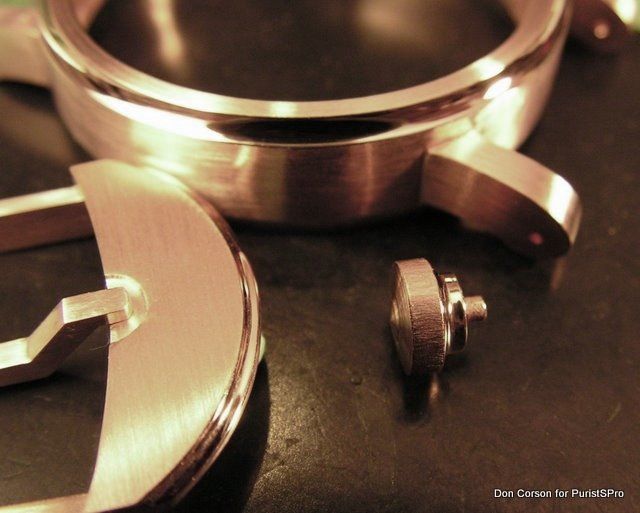


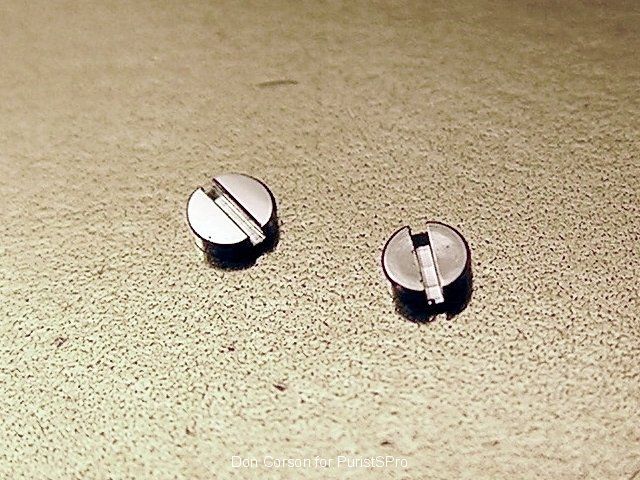
Screws are another interesting story. Although he purchases the standard screws he still needs to finish them and all
the shoulder screws and other non-standards screws he makes.
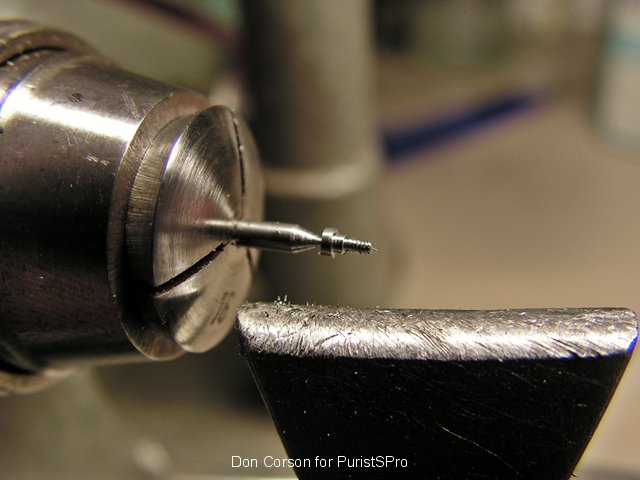
Here we see the click screw in the lathe ready to be parted off.


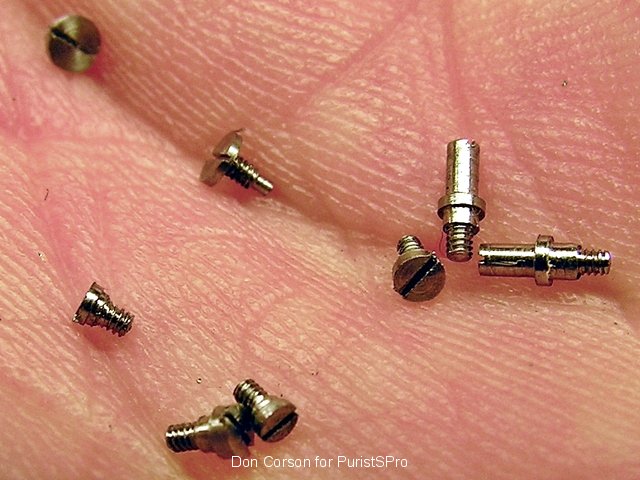
Here is a handful of screws Don made before hardening and polishing. Note there are 2 of each, one is used while
working on the movement and may end up being screwed in and out many times, the other will be installed when the
movement is finally assembled, just once.


Will spare you the pictures of screw polishing. There is not much to see and many steps.

Take a factory made screw and ...
  1. 1. File the head flat
    2. Lap with 9um film
    3. Bevel the slot
    4. Lap and then polish the surface on a tin block
    5. Bevel the circumference
    6. Finish the side.
When you consider that the factory time to make the screw was probably measured in a couple of seconds on an
automatic-screw-making machine, the manual finishing seems excessive at about 15 minutes per screw.
But wow do those screws shine, see the difference yourself below.


At this point, Don has all the parts ready.

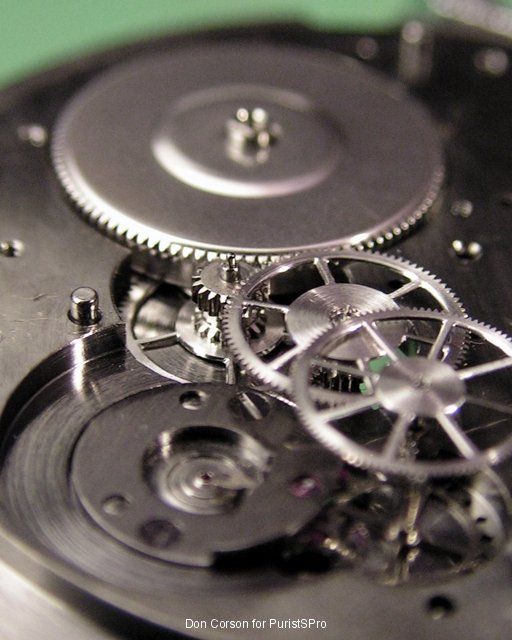
In the next instalment he will reassemble the movement and case up the finished watch.

Here just a little teaser:

Stay tuned for the last installment!


Источник: http://home.watchprosite.com/show-fo...ti-503136/s-0/
__________________
Правила форума
Ответить с цитированием
Эти 2 пользователей сказали Спасибо! Ego за это сообщение:
Gek (16.12.2009), Rump (08.03.2015)
  #4  
Старый 20.03.2009, 14:50
Аватар для Ego
Ego Ego вне форума  
Moderator
 
Регистрация: 03.11.2005
Адрес: Киев
Сообщений: 32,155
Сказал(а) спасибо: 2,127
Поблагодарили 52,540 раз(а) в 10,190 сообщениях
Part 4, The Final Assembly


With all the decorated parts back from plating Don continues by remounting the wheels on the pinions.
Any out-of-flatness must be corrected, which makes for much work.
Here we see the going train in place.


With the barrel and train bridges in place.


Add the winding train and click (the barrel and winding intermediate screws will be replaced with correctly finished ones later).


A first try at fitting in the case. The stem has not yet been cut to length and is way too long.


From the dial side. We notice that the keyless works has not enjoyed any finishing up ‘til now.


The buckle


Half of the keyless work finished, the other half waiting anxiously to be brought up to snuff.


Now it is time to mount the slate dial and ruthenium plated dial frame on the movement.
The dial frame is held on the dial itself with 3 little feet. They are then mounted on the movement as a unit.


Another fitting test in the case.


Now it is time to mount the hands...


Don had to ream the holes in the hands a bit, so the hands are going to have to be repolished and plated again in the future.


The cannon for the seconds hand. 0.8mm diameter, 1.20mm long, the hole for the seconds wheel axle is 0.25mm in diameter.


Now with the seconds hand mounted.


Before closing up the case a little hop on the timing machine. This looks acceptable.

Now cased up in the prototype case I think you will agree that the combination of gray ruthenium plating on
the movement and dial with the red gold case is magnificent.


Don’s attempt to unify the decoration on the dial and movement sides is quite successful.
The horizontal côtes-de-Genève front and back with rhodium hands and wheels works really well.


Fast-change straps, remarkable idea!


This has been a great story of the making of a one-of-a-kind watch by hand, from start to finish.

We thank Don for sharing with us the journey, processes and pictures to help us to better understand his work
and time spent from conceptualizing to the finished product.


__________________
Правила форума
Ответить с цитированием
Эти 11 пользователей сказали Спасибо! Ego за это сообщение:
Augusta (21.03.2009), from (21.03.2009), Gek (16.12.2009), gin (21.03.2009), kshn (22.01.2012), Rump (08.03.2015), spro0t (24.08.2014), TooZ (21.04.2009), Yuyu (21.04.2009), Андрей Крукович (21.03.2009), Сова (21.03.2009)
  #5  
Старый 20.03.2009, 17:00
German German вне форума  
Форумчанин
 
Регистрация: 18.01.2005
Адрес: Москва
Сообщений: 2,963
Сказал(а) спасибо: 185
Поблагодарили 1,692 раз(а) в 549 сообщениях
*грохот челюсти об пол*

Фантастика!

Предыдущие часы у Дона были так себе, а это получилось действительно супер!!!
Ответить с цитированием
  #6  
Старый 20.03.2009, 19:19
Аватар для Механик
Механик Механик вне форума  
Moderator
 
Регистрация: 26.09.2007
Адрес: Москва
Сообщений: 4,945
Сказал(а) спасибо: 9,690
Поблагодарили 10,308 раз(а) в 3,150 сообщениях
Очень красиво! Как-то непонятно, почему стрелки не цепляются друг за друга (надо полагать, на разной высоте от циферблата), и почему заводная головка без накатки (надо полагать просто забыли )
__________________
Всему своё время... Мои часы
Ответить с цитированием
  #7  
Старый 20.03.2009, 22:33
Аватар для Kirill
Kirill Kirill вне форума  
Moderator
 
Регистрация: 13.10.2006
Адрес: Москва
Сообщений: 3,002
Сказал(а) спасибо: 4,004
Поблагодарили 2,606 раз(а) в 849 сообщениях
Интересный обзор, спасибо.
P.S. Стрелки ужасные.
Ответить с цитированием
  #8  
Старый 21.03.2009, 00:18
Аватар для izatis
izatis izatis вне форума  
Совет клуба Watch.ru
 
Регистрация: 09.06.2008
Адрес: Мiнск
Сообщений: 2,488
Сказал(а) спасибо: 450
Поблагодарили 3,223 раз(а) в 1,138 сообщениях
стрелки еще куда ни шло, оригинальные в целом...
у меня вызывает гораздо бОльшие сомнения форма моста колесной передачи, хотелось бы видеть немного другой, стилистически выдержанный контур ...

но за обзор безусловно спасибо, очень познавательно!
Ответить с цитированием
  #9  
Старый 21.03.2009, 10:24
Аватар для Андрей Крукович
Андрей Крукович Андрей Крукович вне форума  
Moderator
 
Регистрация: 07.04.2006
Адрес: Петропавловск-Камчатский
Сообщений: 9,926
Сказал(а) спасибо: 2,474
Поблагодарили 7,294 раз(а) в 3,648 сообщениях
Ого!
Очень интересный материал!
Ответить с цитированием
  #10  
Старый 21.03.2009, 11:34
Аватар для Augusta
Augusta Augusta вне форума  
Moderator
 
Регистрация: 25.10.2007
Адрес: Санкт-Петербург
Сообщений: 3,076
Сказал(а) спасибо: 3,909
Поблагодарили 4,172 раз(а) в 1,525 сообщениях
Спасибо, очень интересно!!!
Ответить с цитированием
Ответ


Быстрый переход


Часовой пояс UTC +3, время: 15:35.